Setting Up Your White Label Portal
Written By Team BugSmash
Last updated 4 months ago
The White Label Portal allows you to fully brand your BugSmash workspace with your own domain and email address. Once configured, your clients will access your branded review portal and receive email invitations and notifications from your own domain instead of BugSmash.
The setup consists of two parts:
Connect your Custom Domain (CNAME)
Configure Custom SMTP
Before you begin
The White Label Portal add-on must be enabled for your workspace.
You'll need access to your domain's DNS settings.
You'll also need your SMTP credentials from your email provider.
Connect Your Custom Domain
Step 1: Open the White Label Portal
Go to:
Workspace Settings → Branding → White Label Portal
In the Custom Domain section, enter the domain or subdomain you'd like to use for your branded portal.
Example:
feedback.solutionwise.in 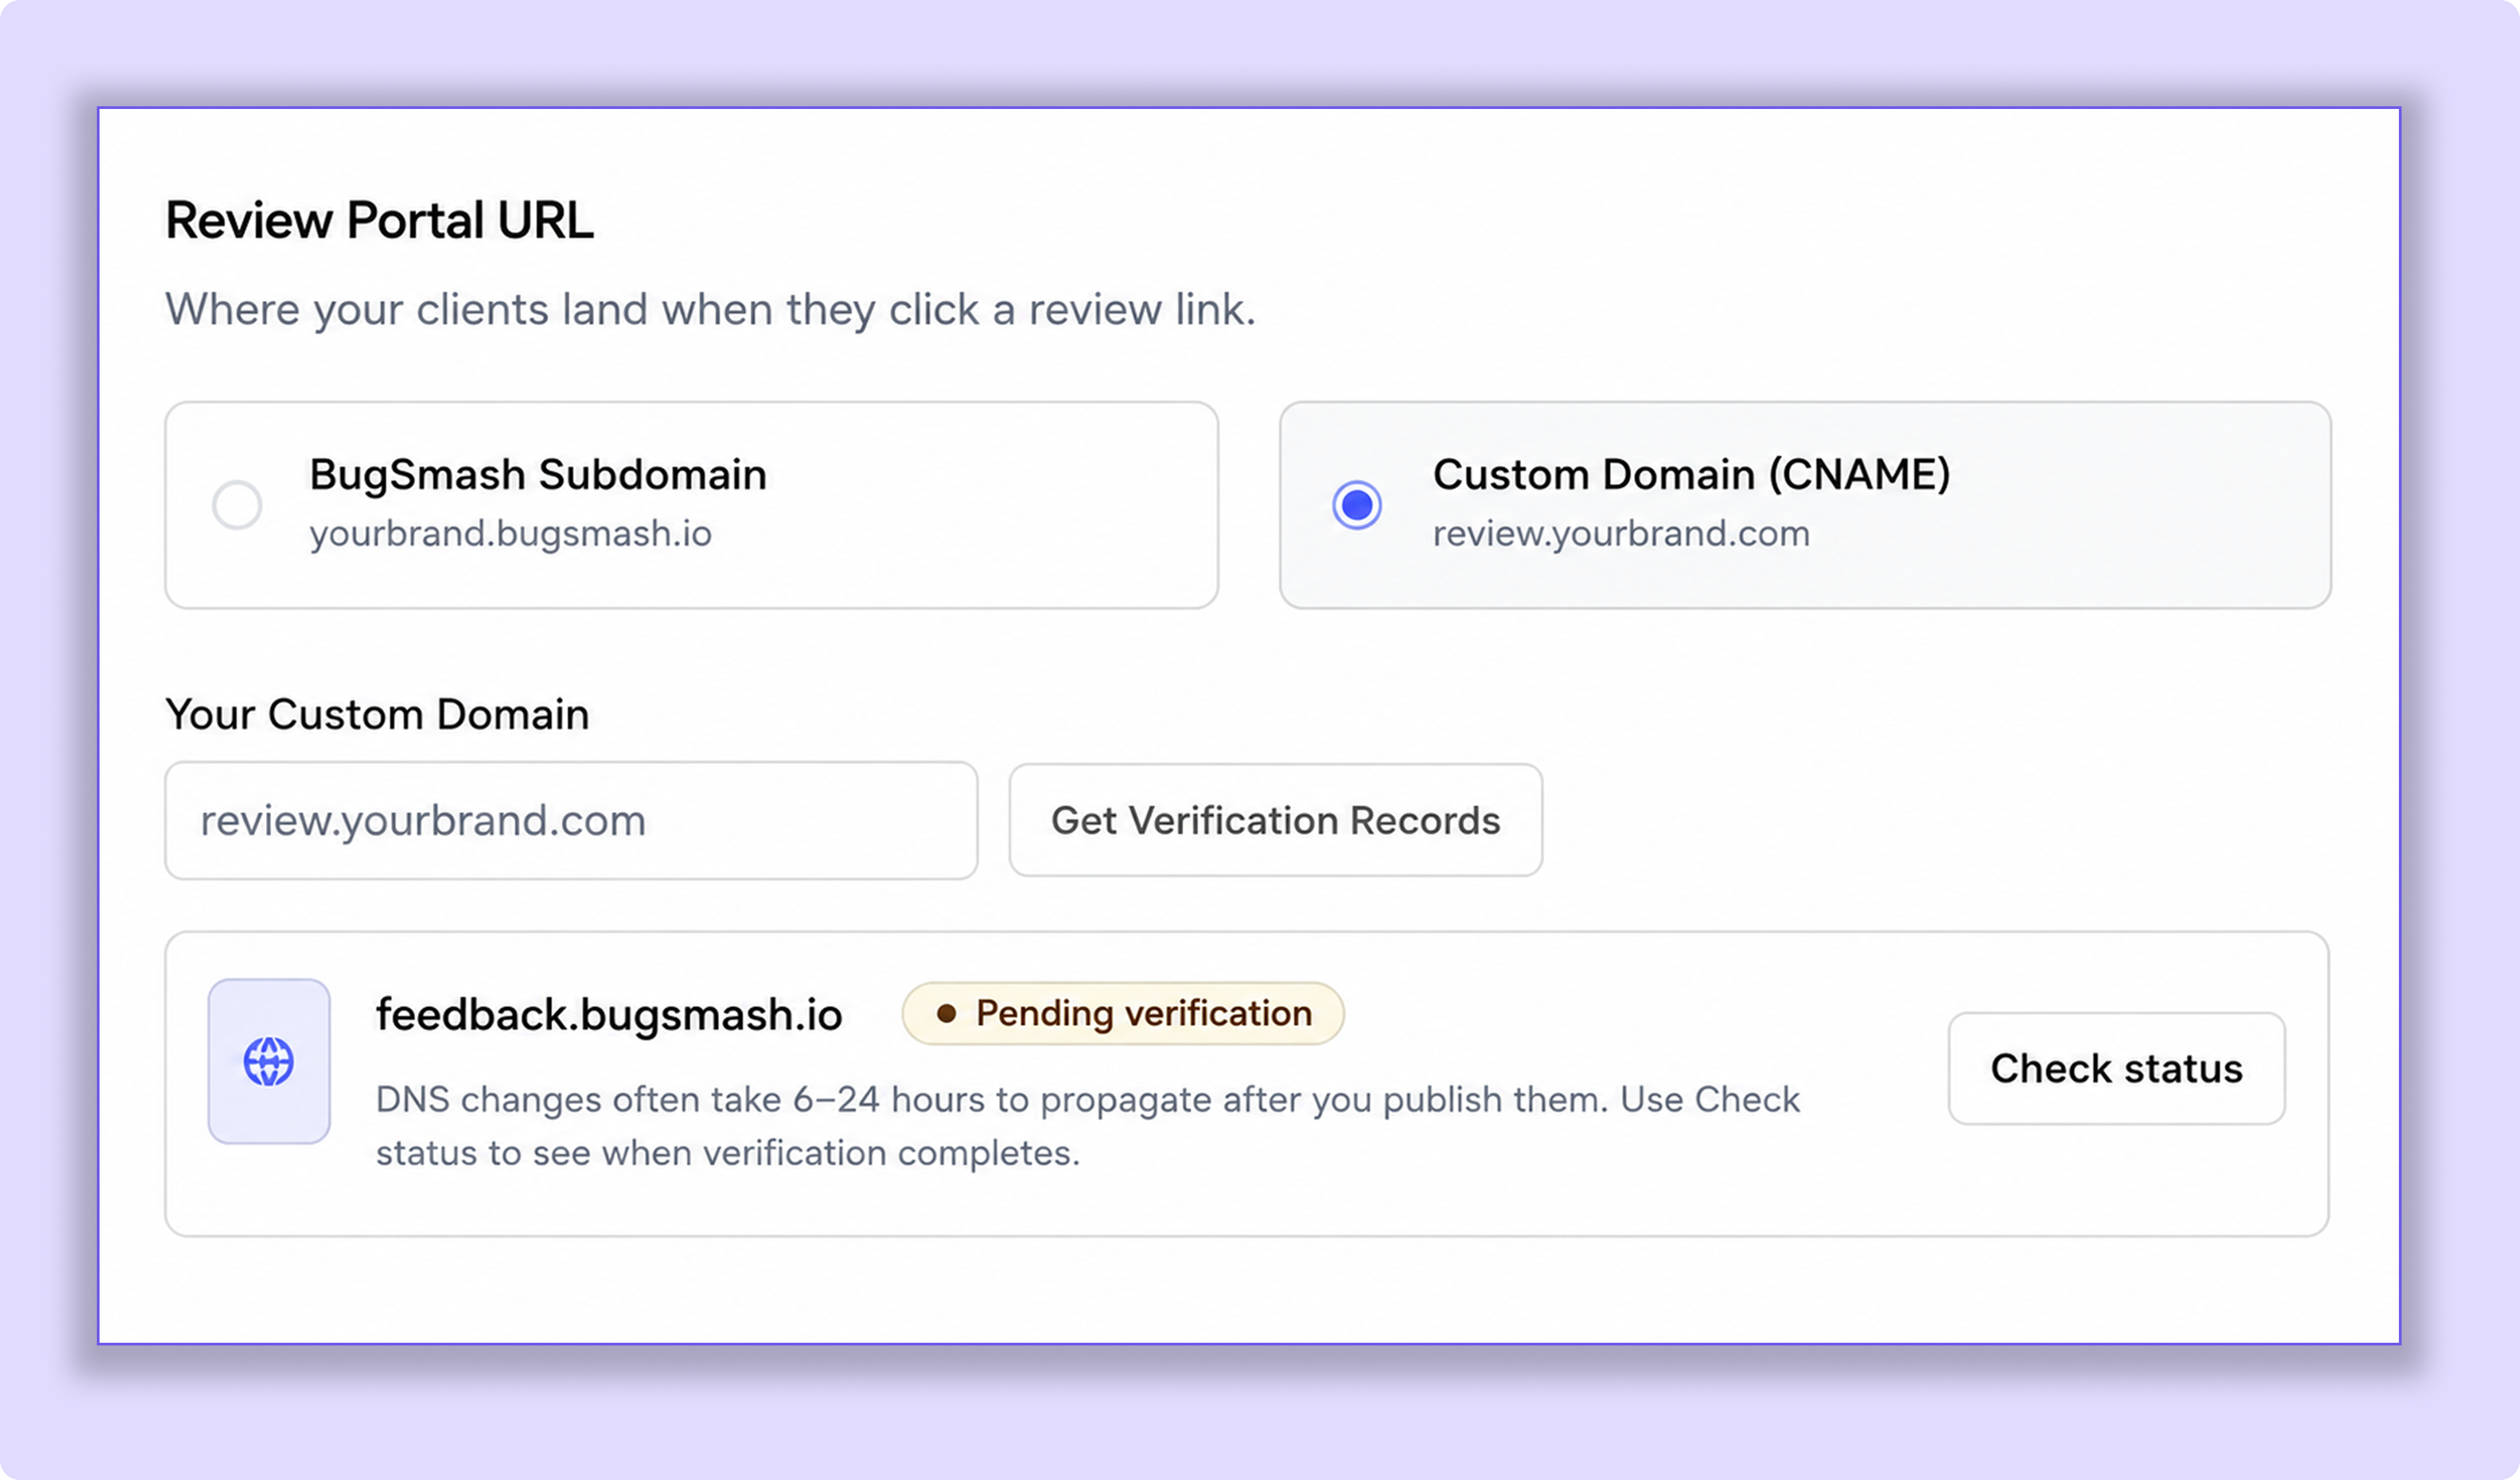
Step 2: Copy the Generated DNS Records
BugSmash will generate two DNS records that you'll need to add to your domain.
Example:
Note: Your TXT verification code will be unique for your domain. Always use the values generated inside your workspace.
Step 3: Add the DNS Records
Log in to your DNS provider (such as Cloudflare, GoDaddy, Namecheap, Hostinger, AWS Route 53, etc.) and open the DNS Management page for your domain.
Create the following records:
TXT Record
CNAME Record
Note: Some DNS providers refer to the destination field as Target, Points To, or Alias. These all refer to the same value.
Step 4: Wait for Verification
Save your DNS records.
DNS propagation usually takes 1–6 hours, although it may complete sooner depending on your DNS provider.
Once verified:
Your domain ownership will be confirmed.
Your custom domain will automatically become active.
Your branded review portal will be accessible through your custom domain.
Configure Custom SMTP
Once your custom domain has been configured, you can set up SMTP to send BugSmash email notifications from your own email address.
Go to:
Workspace Settings → Branding → Custom SMTP
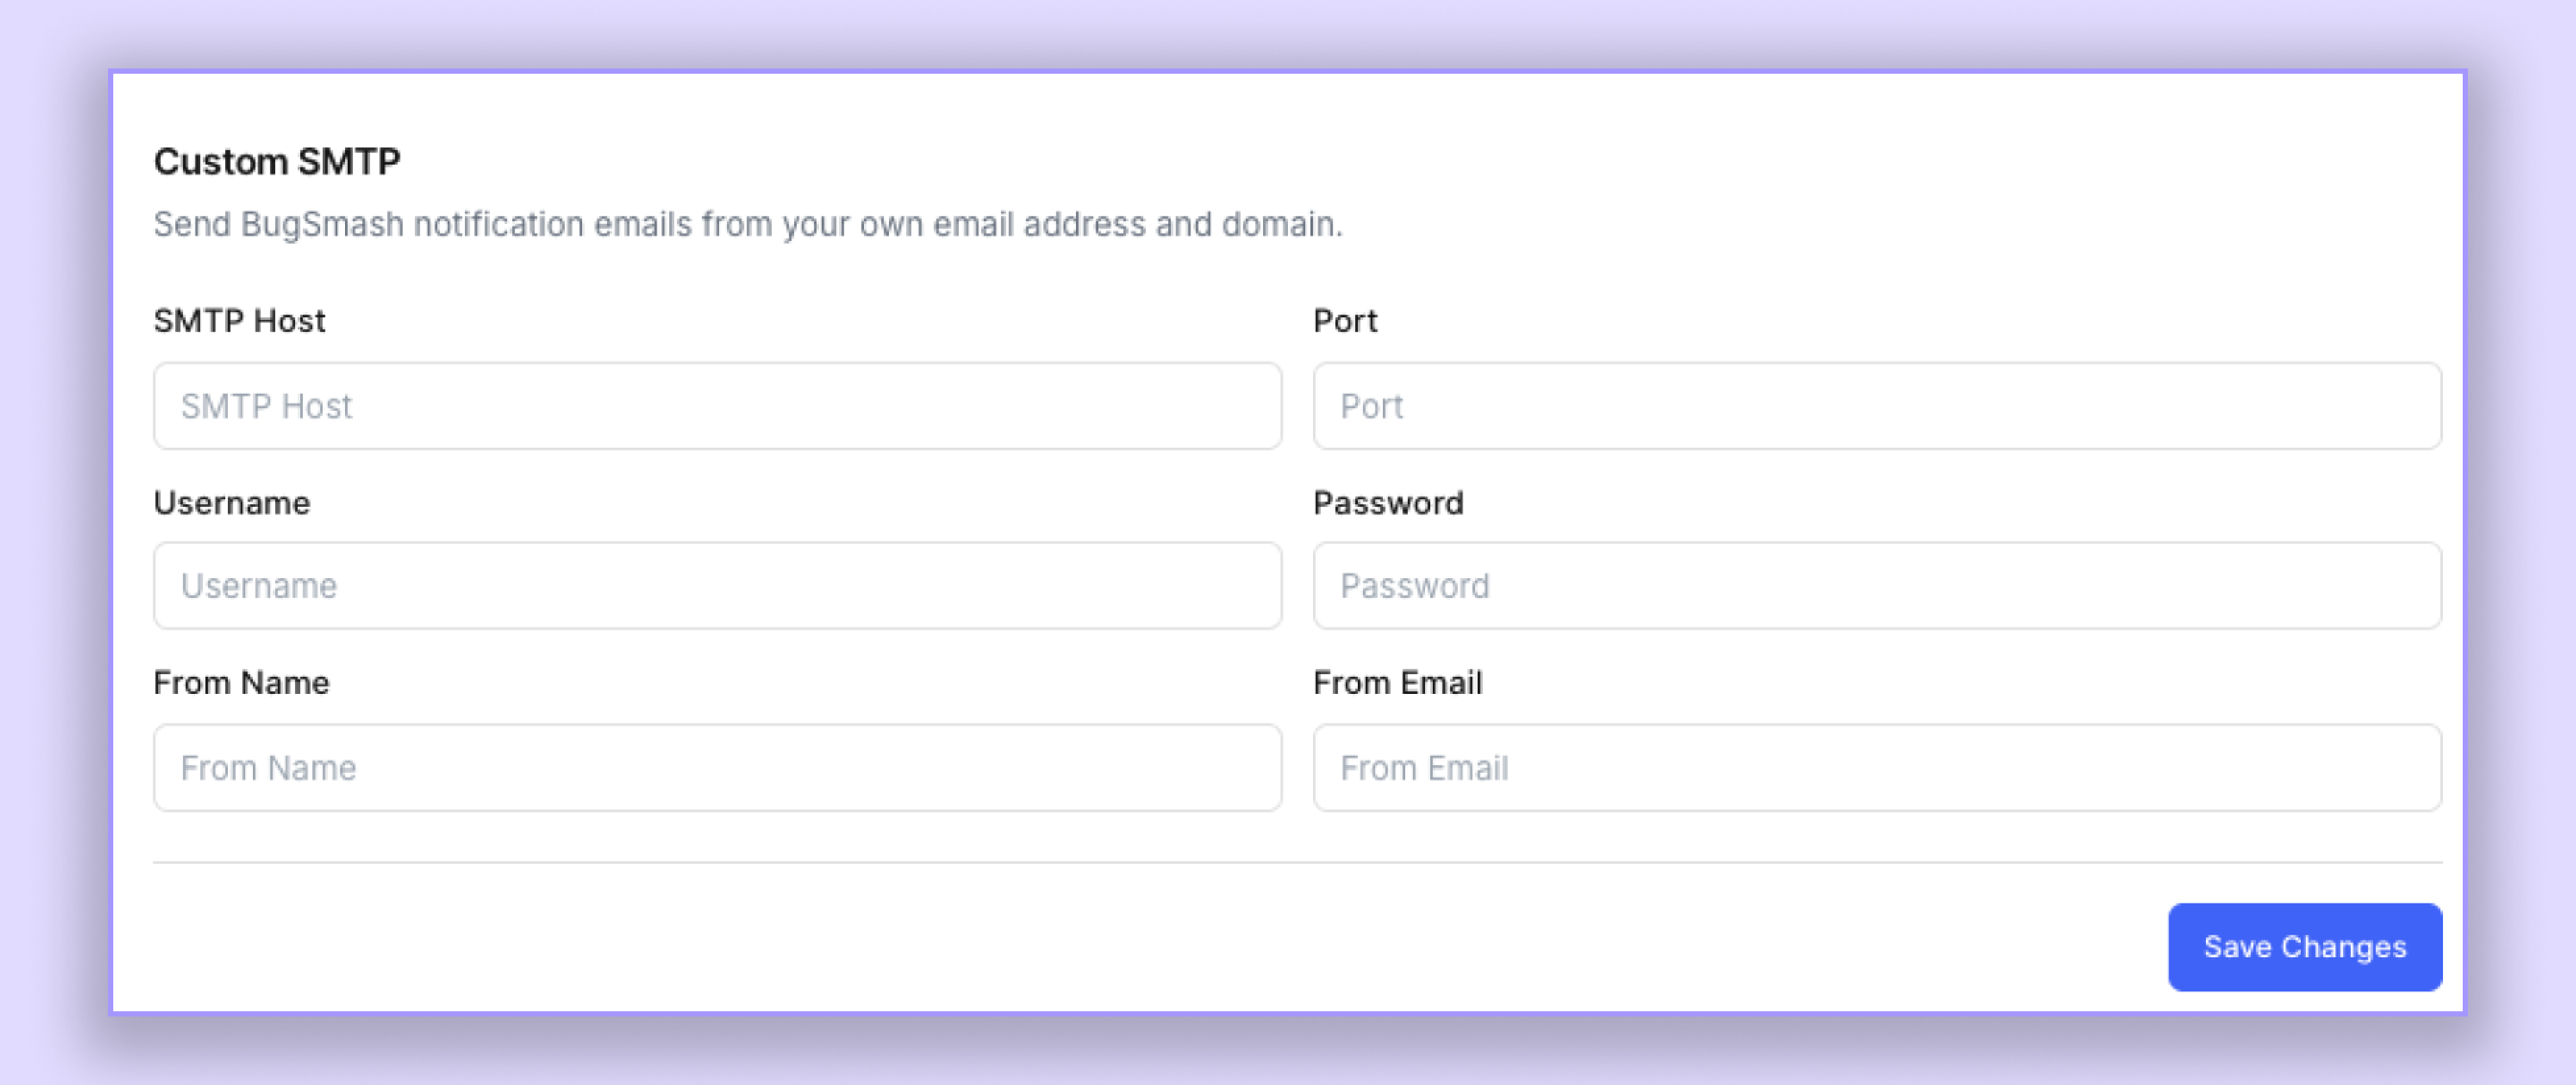
Step 1: Enter Your SMTP Details
Fill in the following information provided by your email service provider.
Step 2: Save Your Changes
After entering all the required details, click Save Changes.
Once your SMTP configuration is saved successfully, BugSmash will start sending email invitations and notifications using your configured email address and sender name.
Troubleshooting
1. My Custom Domain Isn't Active
Wait up to 6 hours for DNS propagation.
Double-check your TXT and CNAME records.
Ensure there are no conflicting DNS records for the same hostname.
2. TXT Verification Failed
Make sure the Host/Name exactly matches the value generated by BugSmash.
Verify that the TXT verification code has been copied correctly.
Remove any extra spaces before saving the record.
3. Emails Aren't Being Sent
Verify your SMTP credentials.
Ensure your email provider allows SMTP connections.
Check your Spam or Junk folder for test emails.
Need Help?
If you're still facing issues after completing the setup, please contact the BugSmash support team and include:
Your custom domain
Your SMTP provider (Google Workspace, Microsoft 365, SendGrid, etc.)
A screenshot of your DNS records
A screenshot of your SMTP settings (please hide your password)
Any error message you're seeing
Was this helpful?
Still need help? Ask the team